
How to save a book to PDF - for beginners
 How to prepare a PDF document for printing from Microsoft Publisher
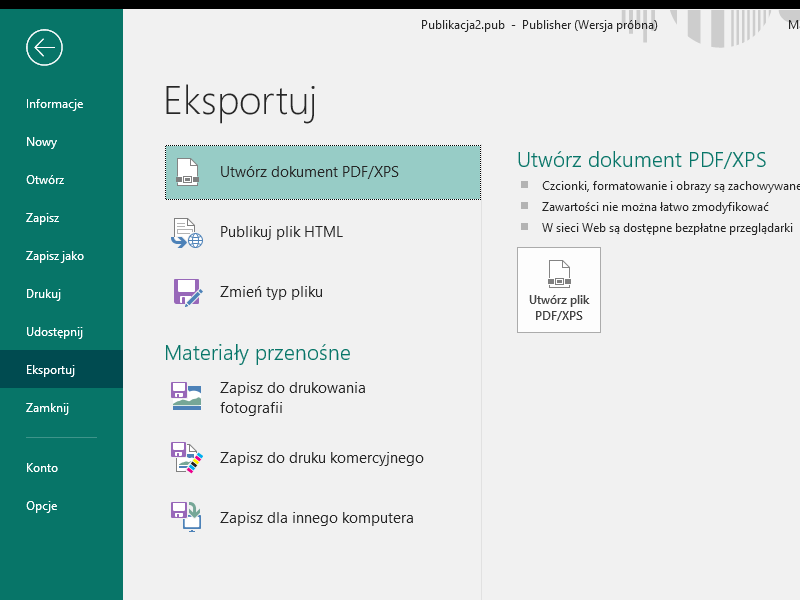
We select export, then create a PDF file.
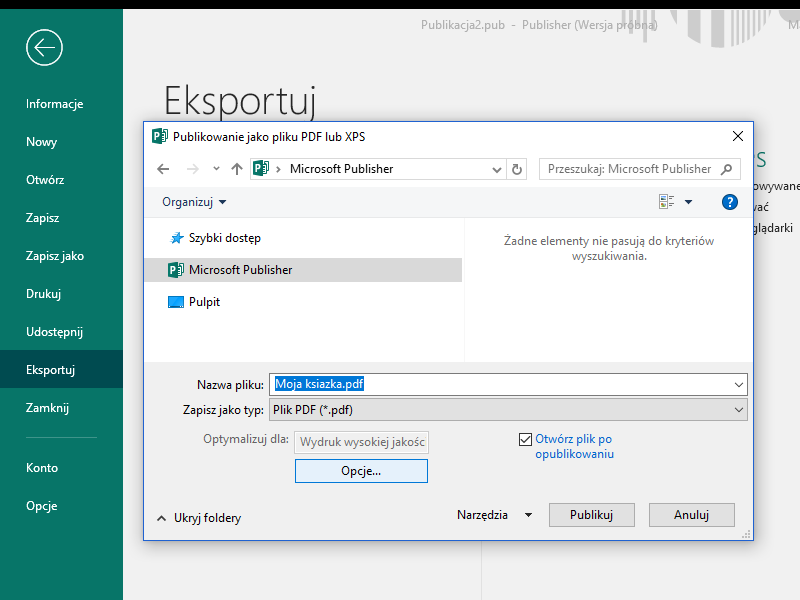 Select the save path and enter your name, then click OPTIONS.
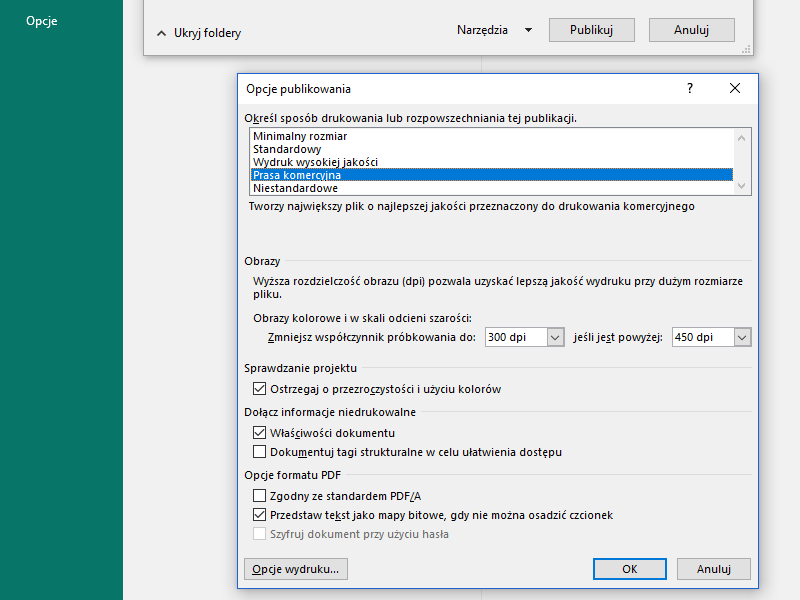 In the options, set "Commercial press", click OK. Then we save the document.
 How to prepare a PDF document for printing from Microsoft Word
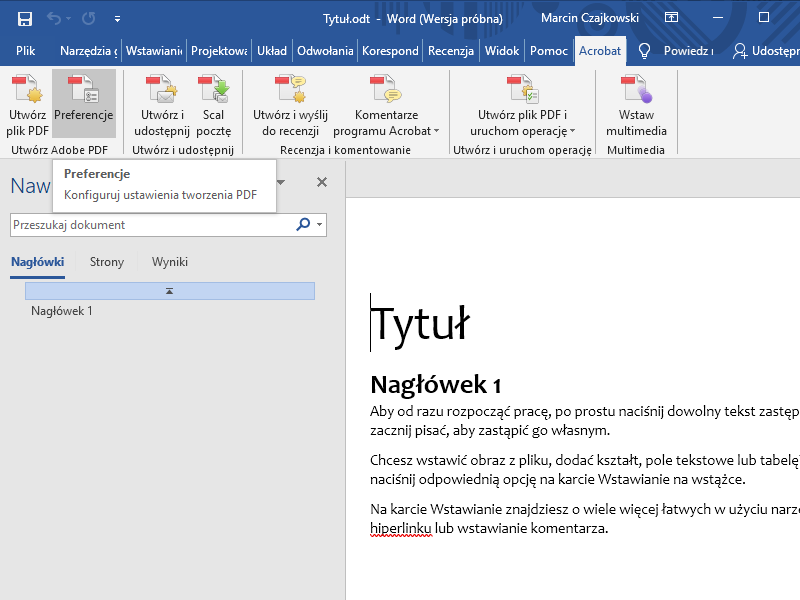
Before we start exporting, we need to set preferences. To do this, we select preferences from the Acrobat menu.
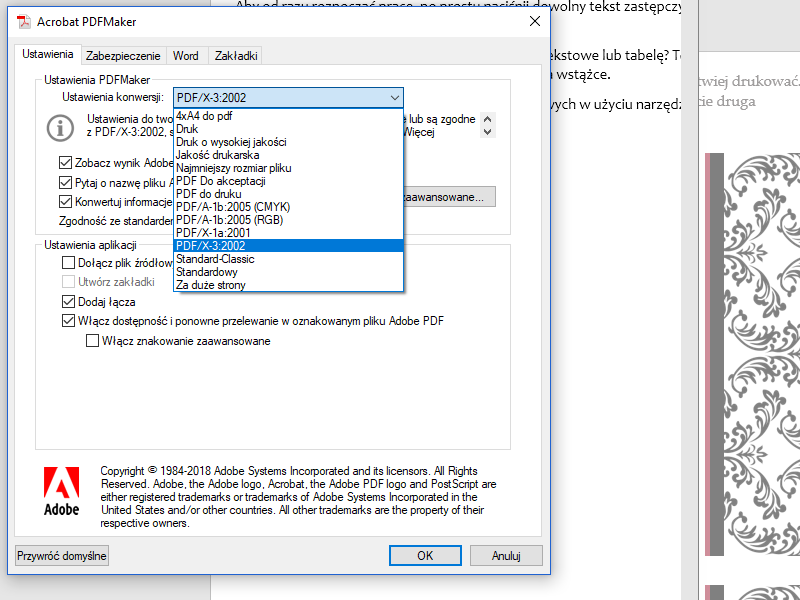 In PDFMaker settings, select "PDF/X-3:2002", if available, select "printer quality" and click "OK"
 Then select "create PDF file"
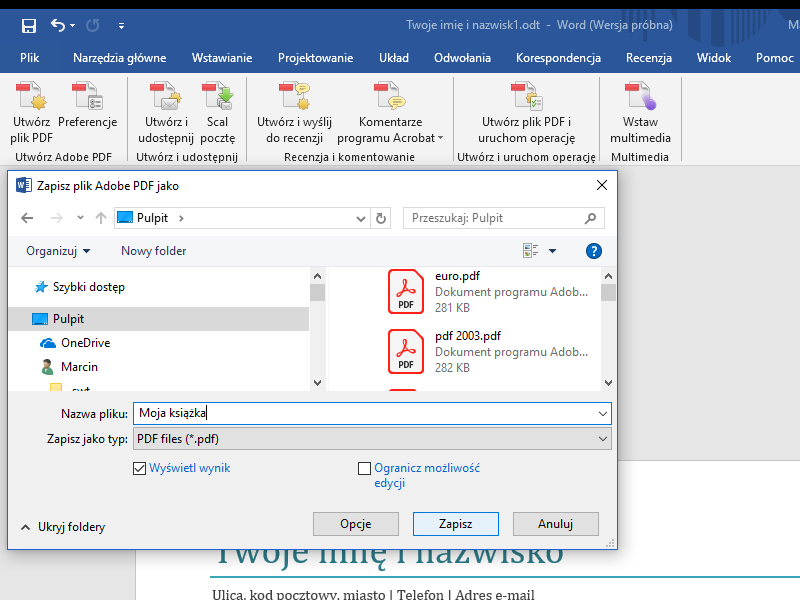 We select the path to save and provide the document name, then save. Due to the fact that Microsoft Word does not support the CMYK design mode, we do not recommend this program for submitting color works
 How to prepare a PDF document for printing from Open Office
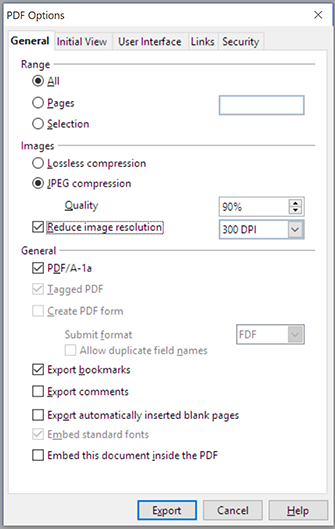 We set the parameters according to the formula.
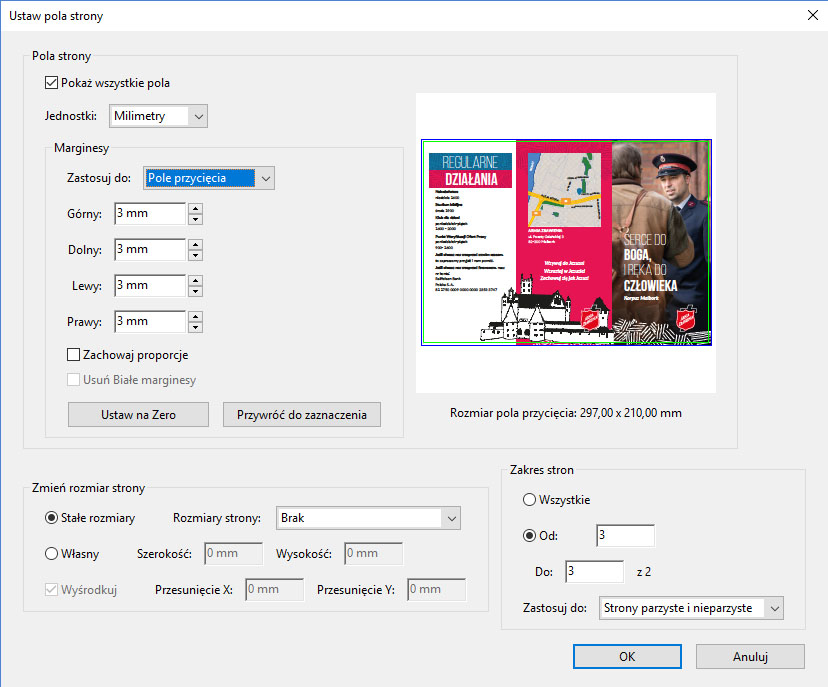 Checking the page field in PDF
Adobe Acrobat allows you to check whether the page fields of a PDF document have been defined correctly.
Preparing a Black and White Book for Printing - For Beginners
Files for book printing should be delivered exclusively in PDF format.
PDF is the optimal format for transferring all graphic designs and publications. Thanks to its internal compression and special structure, PDF has a small file size and ensures that our project will look the same on every computer, which is not standard for other formats.
Before saving the document in PDF format
Make sure that the layout follows the necessary rules for proper printing as described below.
Defining the document page
Page area (trimbox): e.g., 297x210 mm
The page format we work on must correspond to the ordered book format.
Margin: 10 - 20 mm
During design, all important project elements such as text, drawings, etc. should be at an appropriate distance from the edge of the page. To this end, it is worth defining a safe margin in the application.
If the inner pages have a non-white background reaching the page edge, add a bleed
Bleed: 2 mm - 3 mm
In PDF format known as the bleedbox, it is the background that should extend beyond the page format by 2-3 mm. The bleed is cut off during bookbinding, allowing to eliminate white edges at the page border. In the absence of bleed in a PDF document with a printed background, the print shop reserves the right to reduce the book format by a few millimeters to avoid white edges. You can also define a bleed by creating pages of appropriately larger size, adding 4 mm to the page size in each axis.
Spine of the book
If the spine does not contain any printed information and has the same background color as the cover (e.g., white), you do not need to perform any additional tasks. Simply place the cover pages in the PDF document along with the inner pages in the correct order.
If the spine contains text or a color different from the cover, prepare its width according to the number of pages. The correct spine width is displayed in the book calculator on the Printhub website after entering all its parameters.
In this case, provide the spine in a separate PDF document or deliver the entire assembled cover (first and last pages with the spine in the middle) according to the cover template downloaded from our calculator.
Exporting/saving the finished work to PDF format
Each graphic program and text editor has the option to save/export the project to PDF format. When choosing the export/save to PDF option, you can select advanced settings.
Graphic programs usually have predefined settings for exporting to PDF. In this case, choose accordingly based on availability:
- PDF/X-4:2008
- PDF/X-3:2002
- PDF/X-1a:2001
- Printing quality
Next to the images, we show the export method from popular programs.
Uploading finished projects for printing
Uploading PDF projects is available only for logged-in users. You can upload the file only to a previously saved quote or an already placed order. If you have no saved work on your account, uploading is not available.
To upload the PDF project
- After placing the order, click the "My Orders" button, find the given order in the list of orders, and click "Upload".
- Before placing the order, while quoting, log in and click "Save Quote," enter your own job name and confirm.
Click "My Account" > "Saved Quotes" in the upper right corner, and in the list of quotes, click "Upload".
After uploading the PDF file
Mark the document as complete if a complete document with cover and content is uploaded, or as cover/content if two separate documents are uploaded. Document marking is necessary to start the preview creation procedure.
After marking the uploaded files, you will receive an email with a preview link with overlay lines:
- Red-gray is the cutting area (trimbox) corresponding to the finished product format
- Gray-white is the area to be cut off (bleedbox) where the background must reach
- Green-white is the recommended margin for text and important objects (artbox)
If the previews are correct
Click the "Start Production" button under the preview link. The print shop will start processing the order if it has already been paid for.
If the previews are incorrect
You can delete the uploaded file and then upload the corrected project again.
Common PDF document errors
- Document format different from the ordered product format
- Page orientation different from the ordered product
- Incorrectly defined PDF document page areas
- White object overprint setting
- Lack of bleed
- Text on the fold
- Text right next to the cutting edge
- Incorrect colors: RGB, Pantone